CI/CD Contents 순서
- sphinx-autoapi 를 이용한 자동 api 문서 생성하기
- github action을 이용한 ci
- ghcr을 이용한 kubernetes deployment 만들기
- helm을 이용한 deployment chart 만들기
- argocd를 이용한 cd
- argocd를 branch에서 cd
이번 포스트에서는 argocd를 이용해 github branch 에서 cd(continuous delivery) 하는 법에 대해서 알아보겠습니다.
1. github action 설정하기
1.1 CI
CI를 위한 github action을 작성하겠습니다.
 1
 2
 3
 4
 5
 6
 7
 8
 9
10
11
12
13
14
15
16
17
18
19
20
21
22
23
24
25
26
27
28
29
30
31
32
33
34
35
36
37
| docker-image-ci:
runs-on: ubuntu-18.04
steps:
- name: Checkout
uses: actions/checkout@v2
with:
submodules: recursive
fetch-depth: 0
- name: Create shot SHA
uses: benjlevesque/short-sha@v1.2
id: short-sha
- name: Set up Docker Buildx
uses: docker/setup-buildx-action@v1
- name: Login to GitHub Container Registry
uses: docker/login-action@v1
with:
registry: ghcr.io
username: ${{ github.repository_owner }}
password: ${{ secrets.CR_PAT }}
- name: Setup python
uses: actions/setup-python@v2
with:
python-version: '3.8.5'
- name: Generate html
run: |
pip install -r requirements-doc.txt
cd docs
make html
- name: Build and push
uses: docker/build-push-action@v2
with:
push: true
context: ./
file: docker/Dockerfile
tags: |
ghcr.io/aiden-jeon/sphinx-api:latest
ghcr.io/aiden-jeon/sphinx-api:${{ steps.short-sha.outputs.sha }}
|
main branch에 수정이 생기면 docs를 build하고 docker image를 만듭니다.
docs를 build하기 위해서 requirements-doc.txt 를 추가합니다.
1
2
3
| # requirements-doc.txt
sphinx-autoapi==1.6.0
sphinx-rtd-theme==0.5.1
|
1.2 CD
CI를 위한 github action을 작성하겠습니다.
 1
 2
 3
 4
 5
 6
 7
 8
 9
10
11
12
13
14
15
16
17
18
19
20
21
22
23
24
25
26
27
28
29
30
31
32
33
34
35
| docker-image-cd:
runs-on: ubuntu-18.04
steps:
- name: Create short SHA
uses: benjlevesque/short-sha@v1.2
id: short-sha
- name: Checkout deploy repo
uses: actions/checkout@v2
with:
repository: aiden-jeon/github-cicd
token: ${{ secrets.CR_PAT }}
path: github-cicd
- name: Install yq
run: |
wget https://github.com/mikefarah/yq/releases/download/v4.4.1/yq_linux_amd64 -O ./yq
chmod +x ./yq
- name: Change image tag on values.yaml
run: |
cat ./github-cicd/sphinx-doc/values.yaml | ./yq e '.image.tag="${{ steps.short-sha.outputs.sha }}"' - | tee ./github-cicd/sphinx-doc/values.yaml.tmp
mv ./github-cicd/sphinx-doc/values.yaml.tmp ./github-cicd/sphinx-doc/values.yaml
- name: Commit file
run: |
cd github-cicd
git config --local user.email "ells2124@gmail.com"
git config --local user.name "aiden-jeon"
git add ./sphinx-doc/values.yaml
git commit -m "Update sphinx-doc image tag."
- name: Push changes
uses: ad-m/github-push-action@master
with:
directory: github-cicd
repository: aiden-jeon/github-cicd
github_token: ${{ secrets.CR_PAT }}
branch: doc-pages
force: true
|
CI가 종료되면 doc-pages branch 의 values를 수정합니다.
2. APP 생성
cd를 위한 app을 생성하겠습니다.
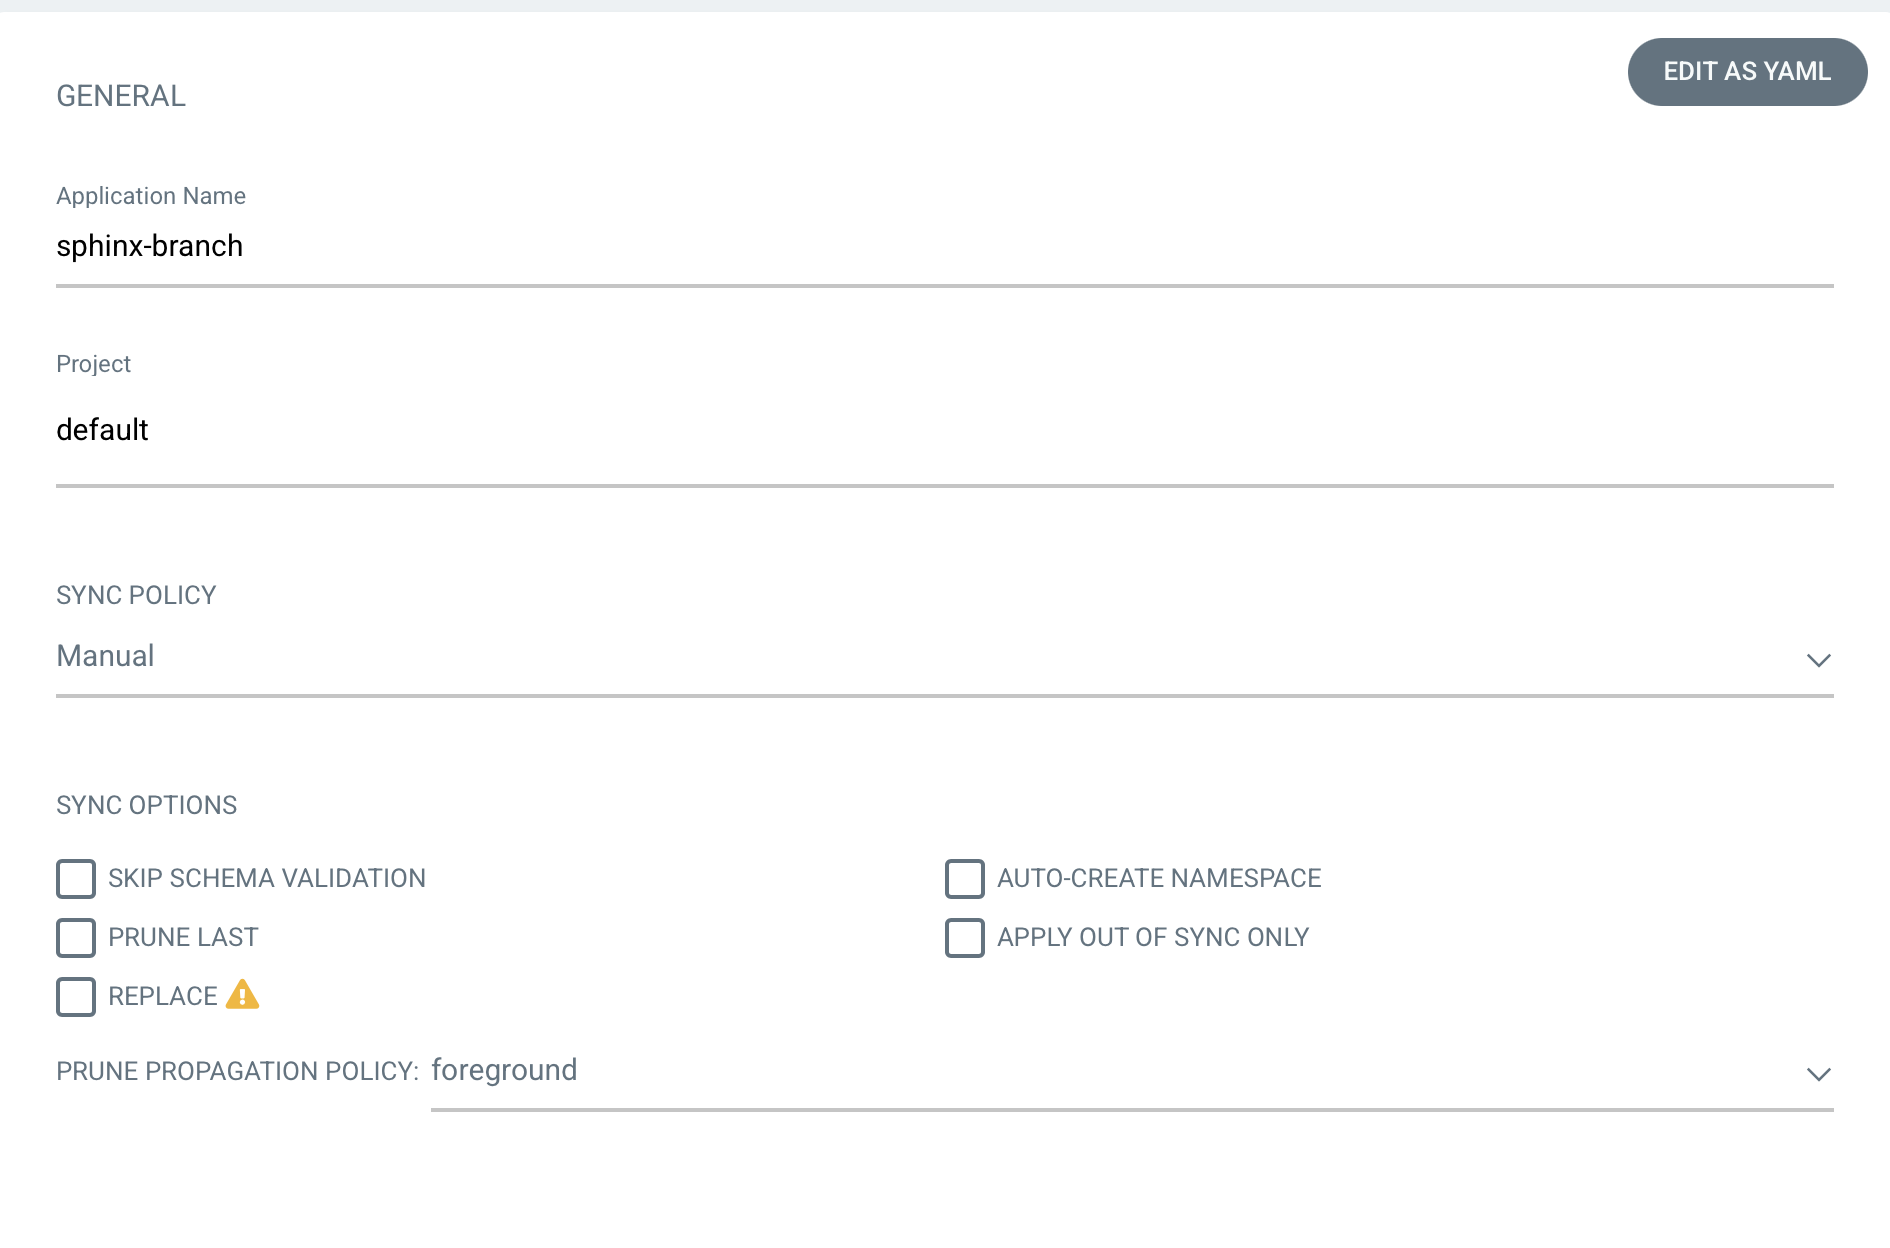
NEW APP 을 눌러 추가하겠습니다.
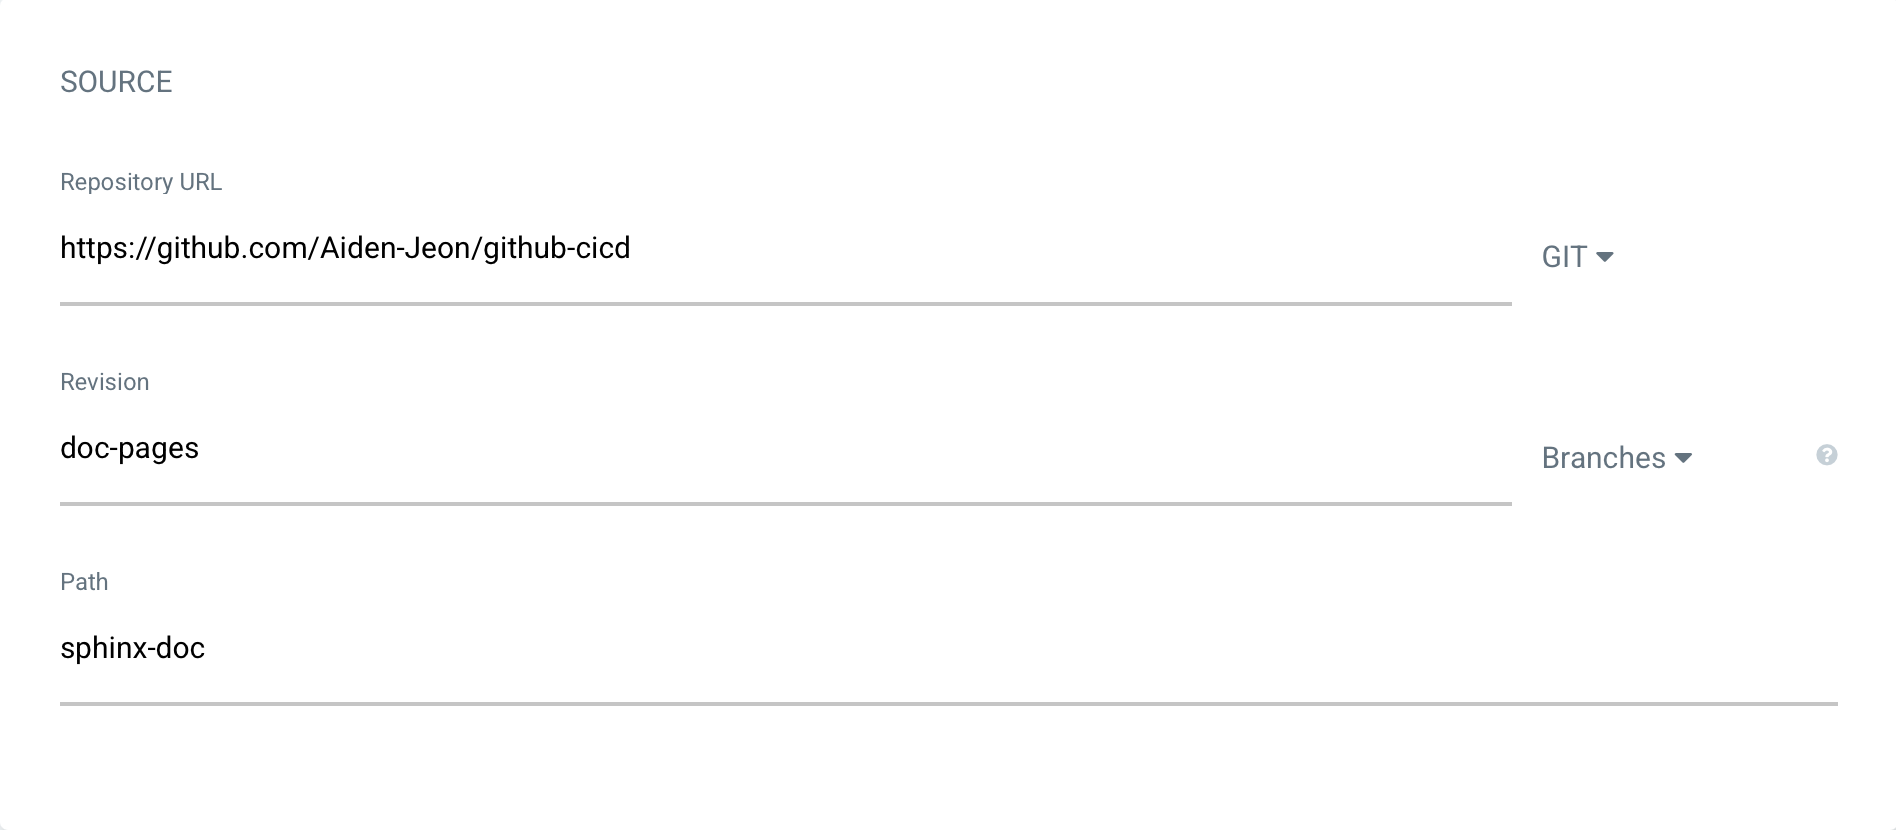
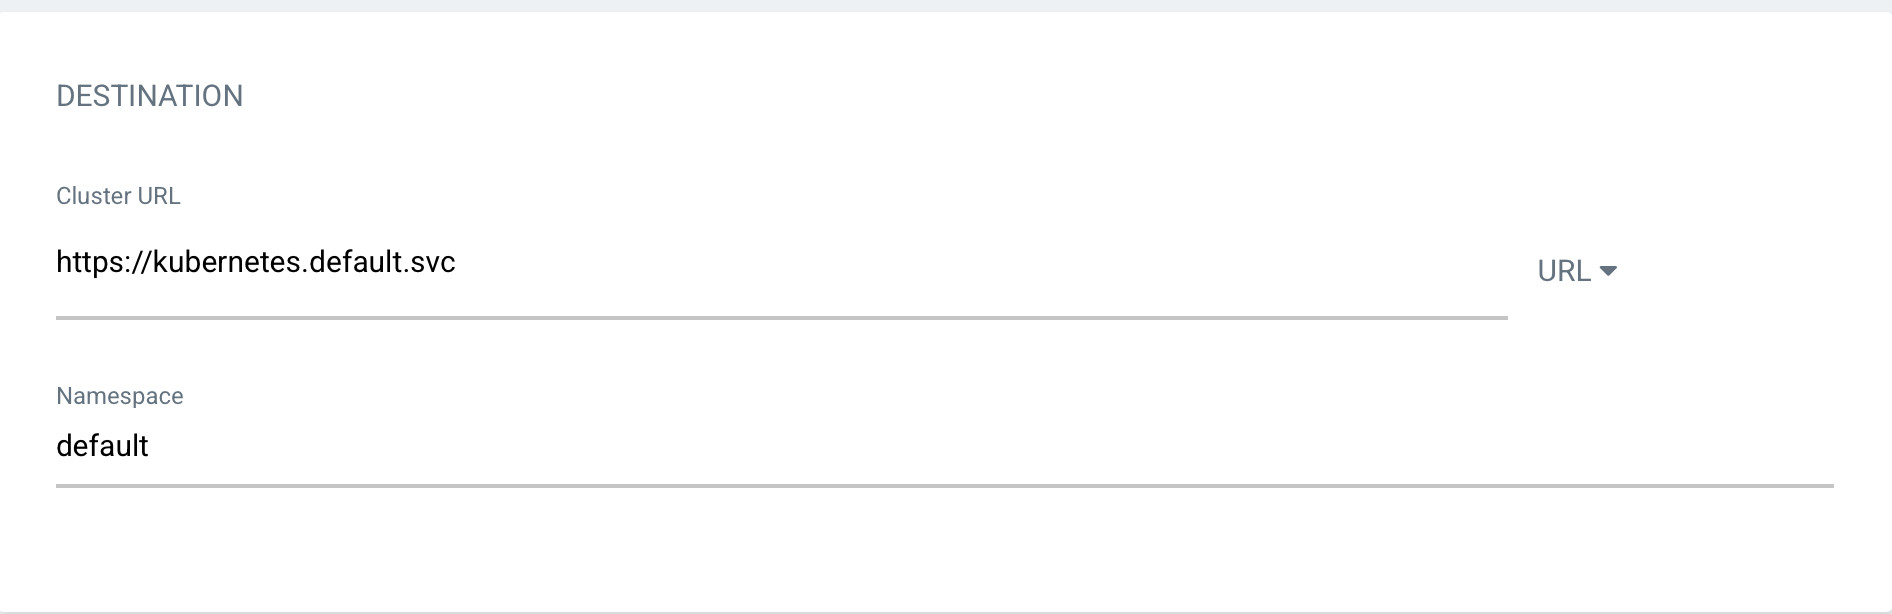
그림-3과 같이 config를 입력하고 create를 해줍니다. 완성되면 아래와 같이 app이 생성됩니다.
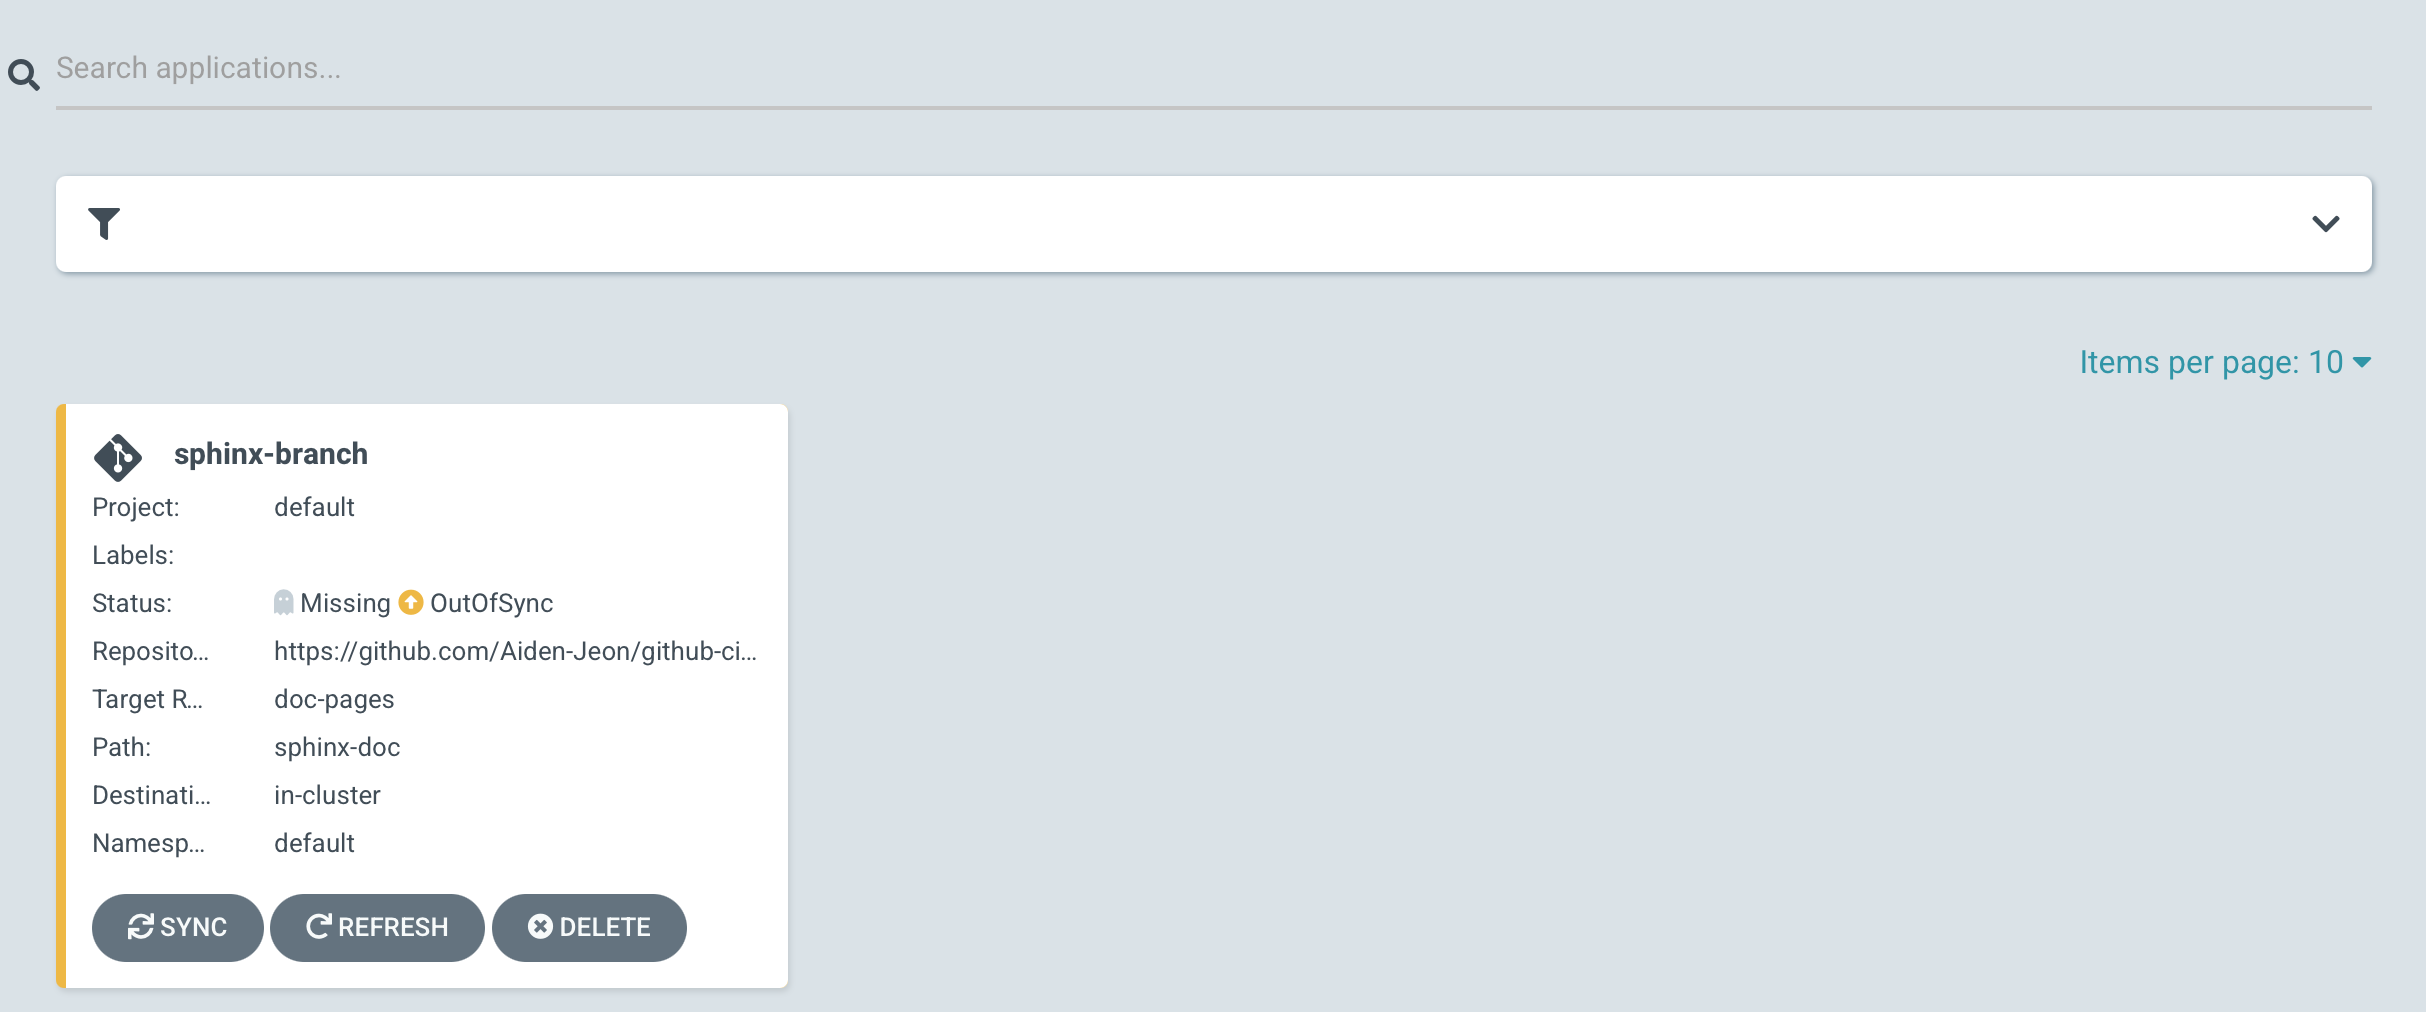
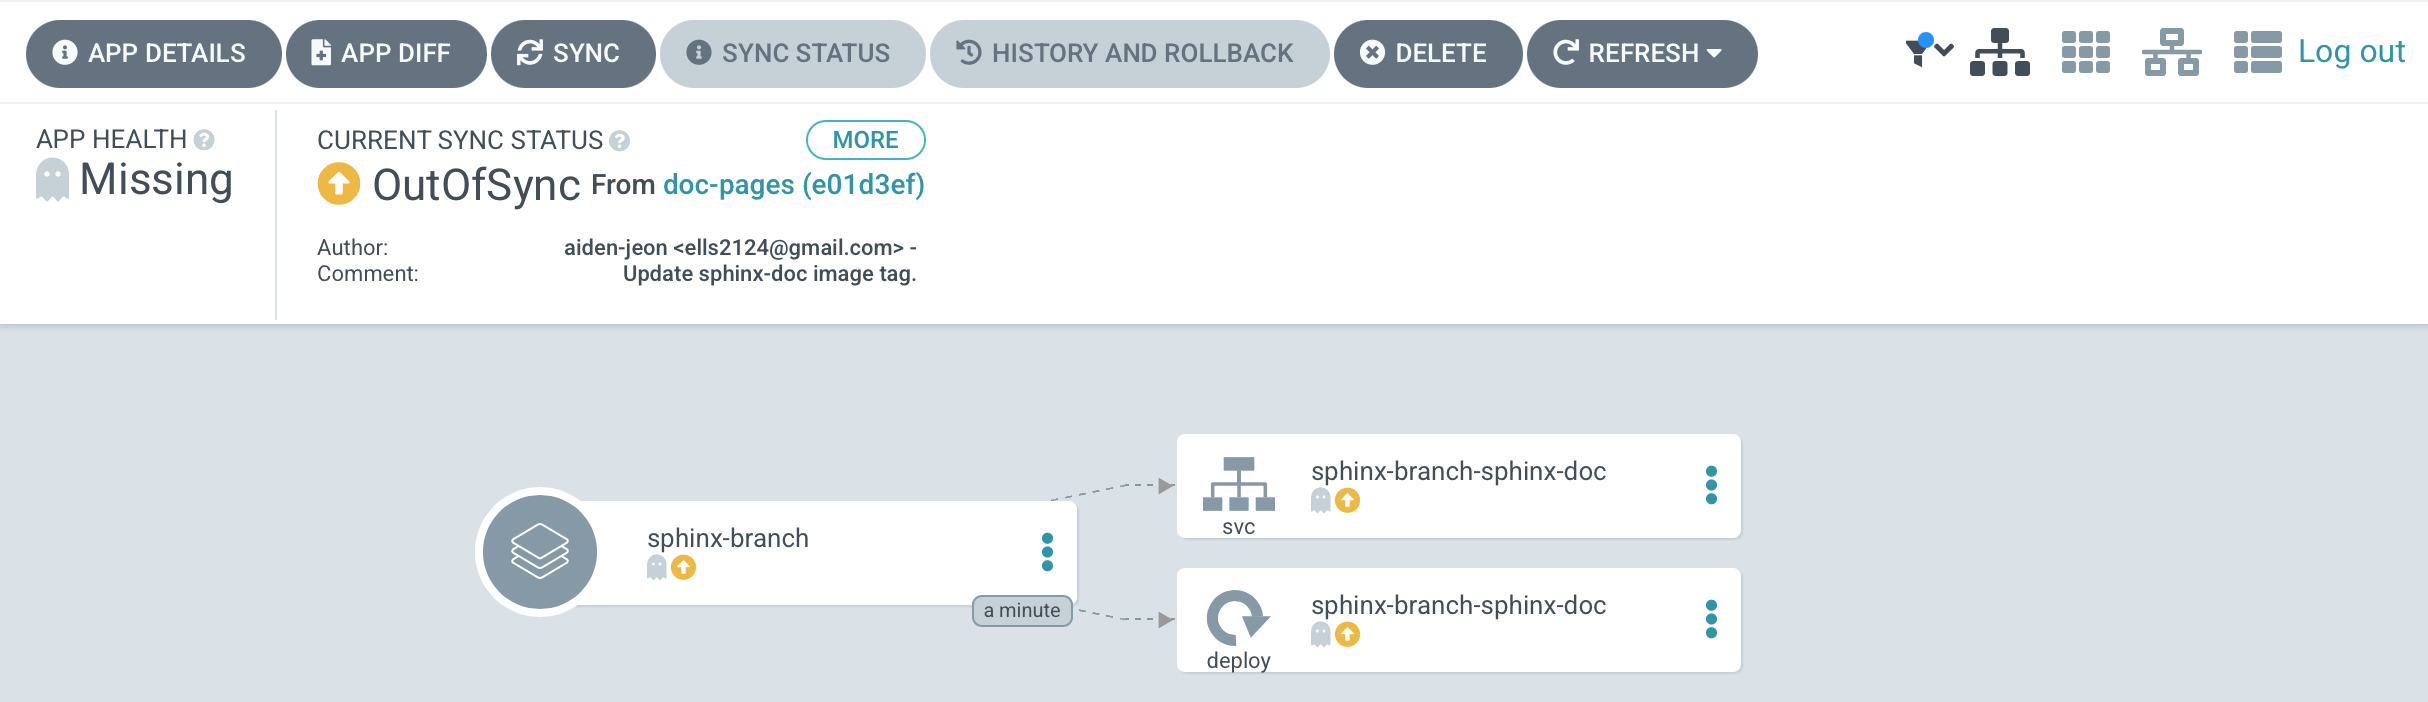
app에 클릭해서 들어가면 다음과 같이 나옵니다. 여기서 SYNC 버튼을 눌러줍니다
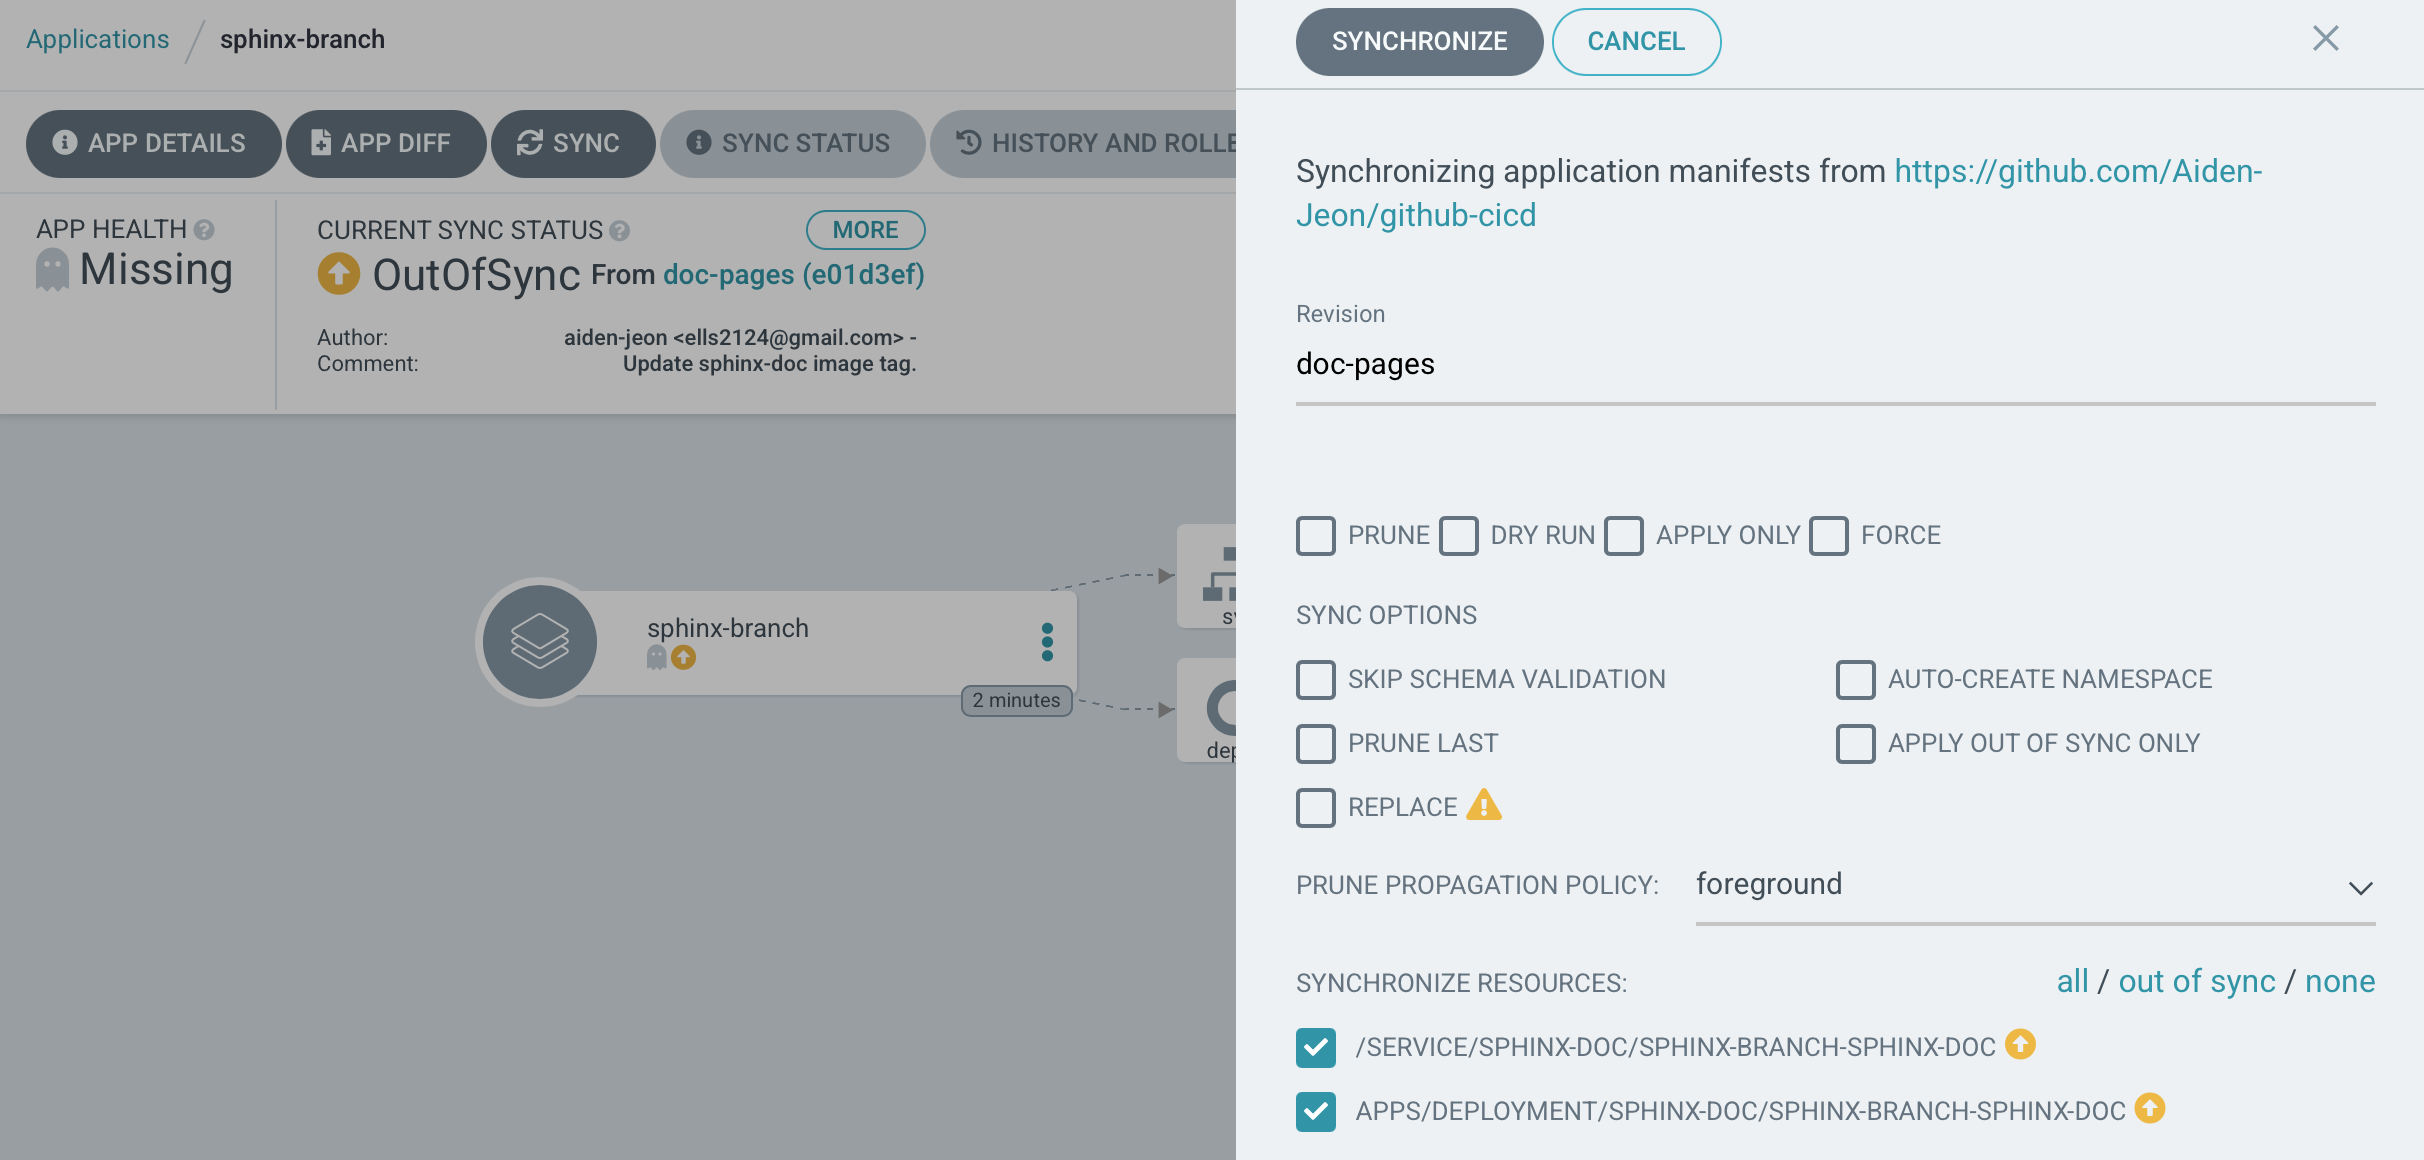
SYNCHRONIZE 버튼을 누릅니다.
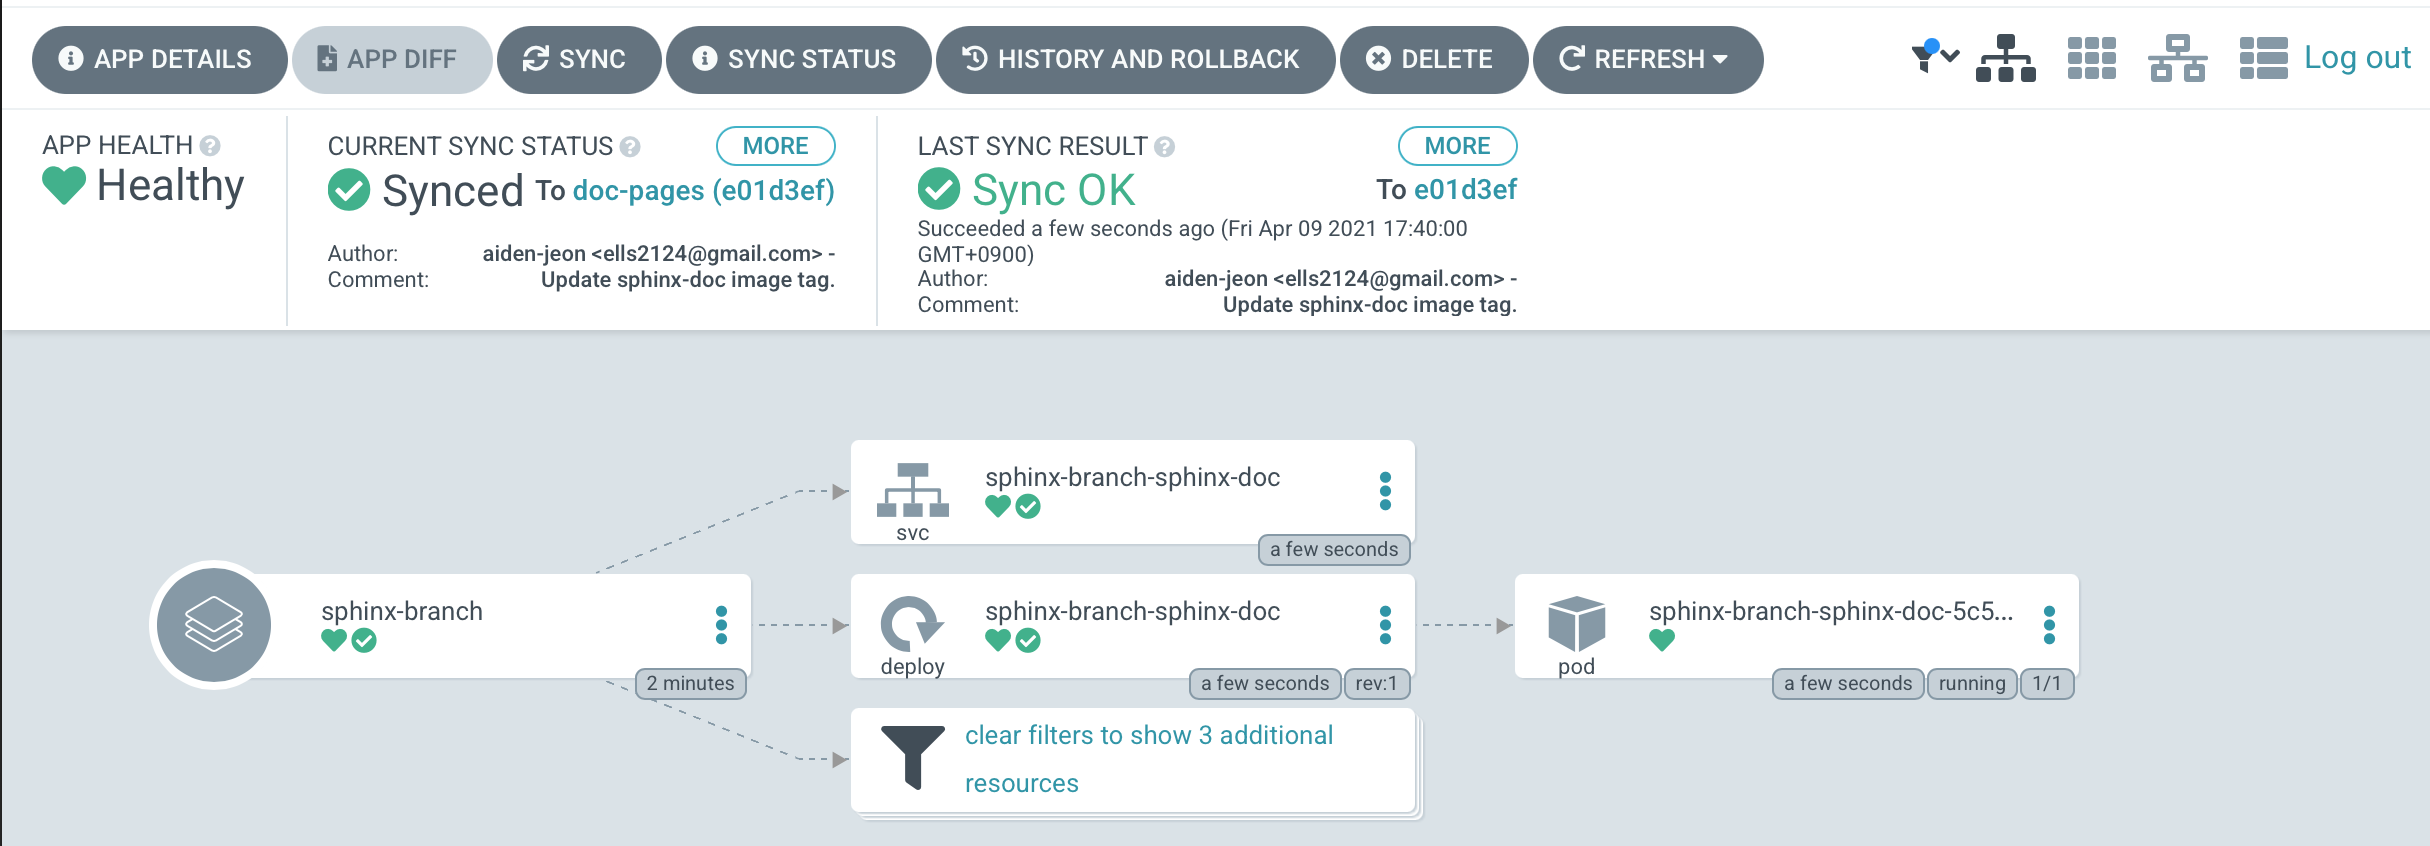
다음은 sync가 완료된 화면입니다.
command창에서 정상적으로 떴는지 확인해봅니다.
 1
 2
 3
 4
 5
 6
 7
 8
 9
10
11
12
13
| ❯ kubectl get all -n sphinx-doc
NAME READY STATUS RESTARTS AGE
pod/sphinx-branch-sphinx-doc-5c597645d-wr69x 1/1 Running 0 35s
NAME TYPE CLUSTER-IP EXTERNAL-IP PORT(S) AGE
service/sphinx-branch-sphinx-doc NodePort 10.107.46.101 <none> 80:30903/TCP 36s
NAME READY UP-TO-DATE AVAILABLE AGE
deployment.apps/sphinx-branch-sphinx-doc 1/1 1 1 35s
NAME DESIRED CURRENT READY AGE
replicaset.apps/sphinx-branch-sphinx-doc-5c597645d 1 1 1 35s
|
4. 확인
다음 명령어로 접속할 ip와 포트를 얻습니다.
 1
 2
 3
 4
 5
 6
 7
 8
 9
10
11
| ❯ minikube service -n sphinx-doc --url sphinx-branch-sphinx-doc
🏃 Starting tunnel for service sphinx-branch-sphinx-doc.
|------------|--------------------------|-------------|------------------------|
| NAMESPACE | NAME | TARGET PORT | URL |
|------------|--------------------------|-------------|------------------------|
| sphinx-doc | sphinx-branch-sphinx-doc | | http://127.0.0.1:63918 |
|------------|--------------------------|-------------|------------------------|
http://127.0.0.1:63918
❗ Because you are using a Docker driver on darwin, the terminal needs to be open to run it.
|
정상적으로 실행이 되었는지 확인합니다.