CI/CD Contents 순서
- sphinx-autoapi 를 이용한 자동 api 문서 생성하기
- github action을 이용한 ci
- ghcr을 이용한 kubernetes deployment 만들기
- helm을 이용한 deployment chart 만들기
- argocd를 이용한 cd
sphinx-autoapi를 이용해 자동으로 python api 문서를 생성하는 법에 대해 알아보겠습니다.
1. API 코드 작성
우선 간단한 계산기 api를 만들어 보겠습니다.
src/cacluator.py 에 다음과 같은 Class를 생성했습니다.
Api 에 사용한 docstring은 numpy style를 사용하도록 하겠습니다.
 1
 2
 3
 4
 5
 6
 7
 8
 9
10
11
12
13
14
15
16
17
18
19
20
21
22
23
24
25
26
27
28
29
30
31
32
33
34
35
36
37
38
| class Calculator:
def add(self, a: float, b: float) -> float:
"""add given two number
Examples::
calculator = Calculator()
calculator.add(3, 4)
Parameters
----------
a : float
b : float
Returns
-------
float
"""
return a + b
def mul(self, a: float, b: float) -> float:
"""multiply given two number
Examples::
calculator = Calculator()
calculator.mul(3, 4)
Parameters
----------
a : floatp
b : float
Returns
-------
float
"""
return a * b
|
2. sphinx 설치
sphinx-autoapi를 설치합니다.
1
| pip install sphinx-autoapi sphinx-theme sphinx_rtd_theme
|
3. sphinx-quickstart
우선 sphinx 환경을 설정해야 합니다. docs 폴더를 만든 후 아래 명령어를 이용해 빠르게 설정을 할 수 있습니다.
1
2
3
| mkdir docs
cd docs
sphinx-quickstart
|
sphinx-quickstart 설정 과정은 아래와 같습니다.
- default 값으로 source 와 build 디렉토리를 분리하지 않겠습니다. (n 을 입력해주세요.)
 1
 2
 3
 4
 5
 6
 7
 8
 9
10
11
| Welcome to the Sphinx 3.5.1 quickstart utility.
Please enter values for the following settings (just press Enter to
accept a default value, if one is given in brackets).
Selected root path: .
You have two options for placing the build directory for Sphinx output.
Either, you use a directory "_build" within the root path, or you separate
"source" and "build" directories within the root path.
> Separate source and build directories (y/n) [n]: n
|
- 프로젝트 관련 이름들은 다음과 같이 작성했습니다.
1
2
3
| > 프로젝트 이름: example
> 작성자 이름: aiden-jeon
> 프로젝트 출시 버전 []: 0.1
|
- 프로젝트 언어는 en을 설정하겠습니다. (Enter를 입력해주세요.)
설정이 완료되면 docs/ 밑에 아래와 같은 파일들이 생성됩니다.
1
2
| > ls
Makefile _build _static _templates conf.py index.rst make.bat
|
3. sphinx 설정하기
생성된 파일중 conf.py 는 sphinx와 관련된 설정들이 있는 파일입니다.
extensions에 아래와 같이 추가합니다.
1
2
3
4
5
| extensions = [
"sphinx_rtd_theme",
"autoapi.extension",
"sphinx.ext.napoleon",
]
|
sphinx_rtd_theme: sphinx에서 지원하는 테마중 readthedocs 테마를 이용하기 위한 extension입니다.autoapi.extension: autoapi를 사용하기 위한 extension 입니다.sphinx.ext.napoleon: numpy style docstring을 인식하기 위한 extension 입니다.
extension 밑에 autoapi 관련 설정도 입력합니다.
1
2
3
4
| autoapi_type = "python"
autoapi_dirs = [
os.path.join(os.path.dirname(os.path.dirname(os.path.abspath(__file__))), "src")
]
|
테마는 readthedocs 테마를 이용하겠습니다.
1
| html_theme = "sphinx_rtd_theme"
|
수정된 전체 conf.py는 다음과 같습니다.
1
2
3
4
5
6
7
8
9
10
11
12
13
14
15
16
17
18
19
20
21
22
23
24
25
26
27
28
29
30
31
32
| import os
# -- Project information -----------------------------------------------------
project = "example"
copyright = "2021, aiden-jeon"
author = "aiden-jeon"
# The full version, including alpha/beta/rc tags
release = "0.1"
# -- General configuration ---------------------------------------------------
extensions = [
    "sphinx_rtd_theme",
    "autoapi.extension",
    "sphinx.ext.napoleon",
]
autoapi_type = "python"
autoapi_dirs = [
os.path.join(os.path.dirname(os.path.dirname(os.path.abspath(__file__))), "src")
]
templates_path = ["_templates"]
exclude_patterns = ["_build", "Thumbs.db", ".DS_Store"]
# -- Options for HTML output -------------------------------------------------
html_theme = "readthedocs"
html_static_path = ["_static"]
|
4. html build
이제 설정된 값으로 html 을 build 해보겠습니다.
build가 성공적으로 되었다면 _build/html 경로에 다음과 같이 파일들이 생성됩니다.
1
2
3
4
| > cd _build/html
> ls
_sources autoapi index.html py-modindex.html searchindex.js
_static genindex.html objects.inv search.html
|
index.html 을 열면 아래와 같은 api documentation을 볼 수 있습니다.
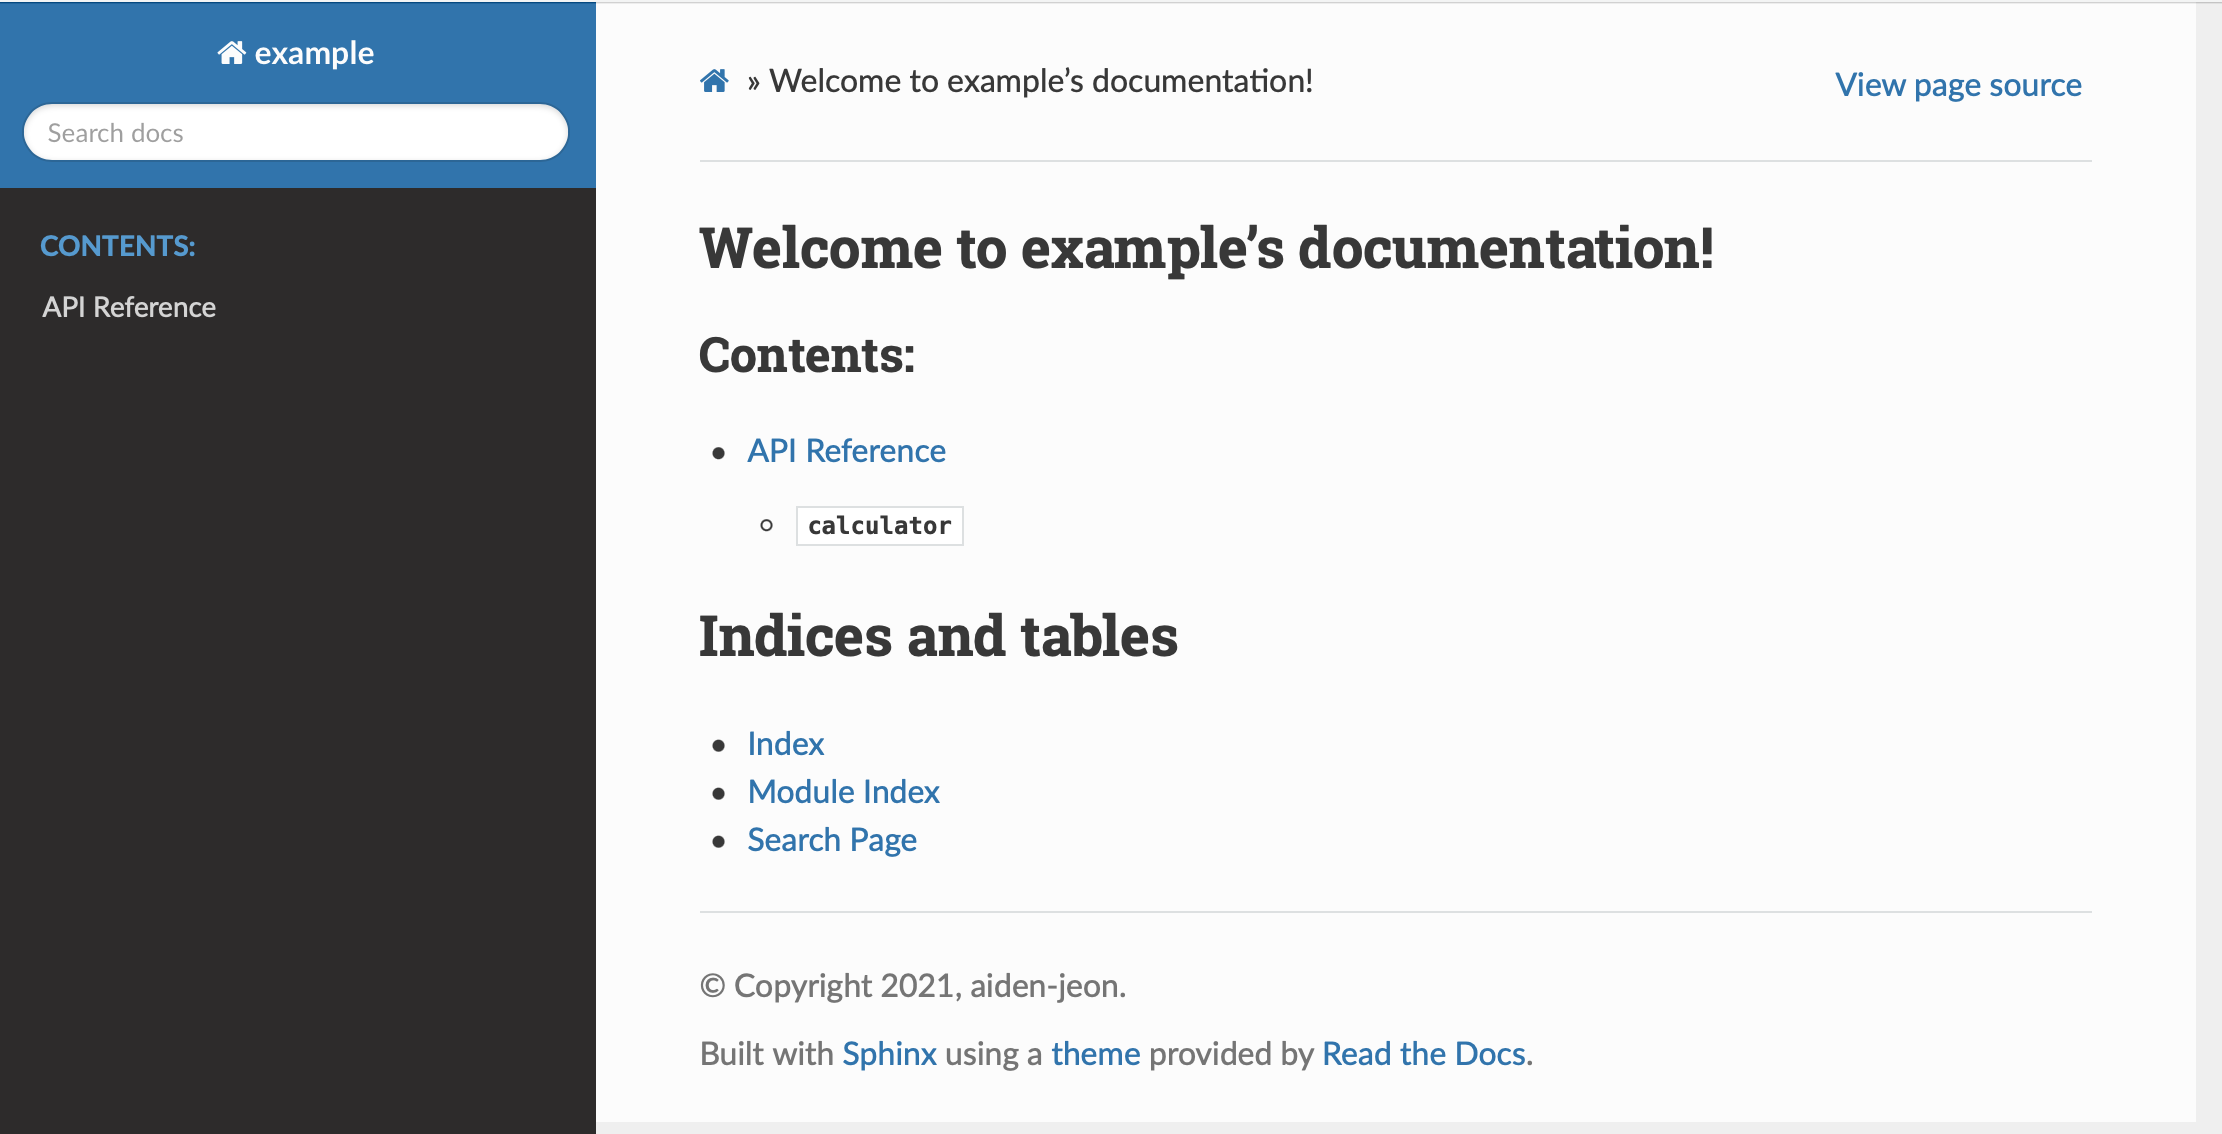
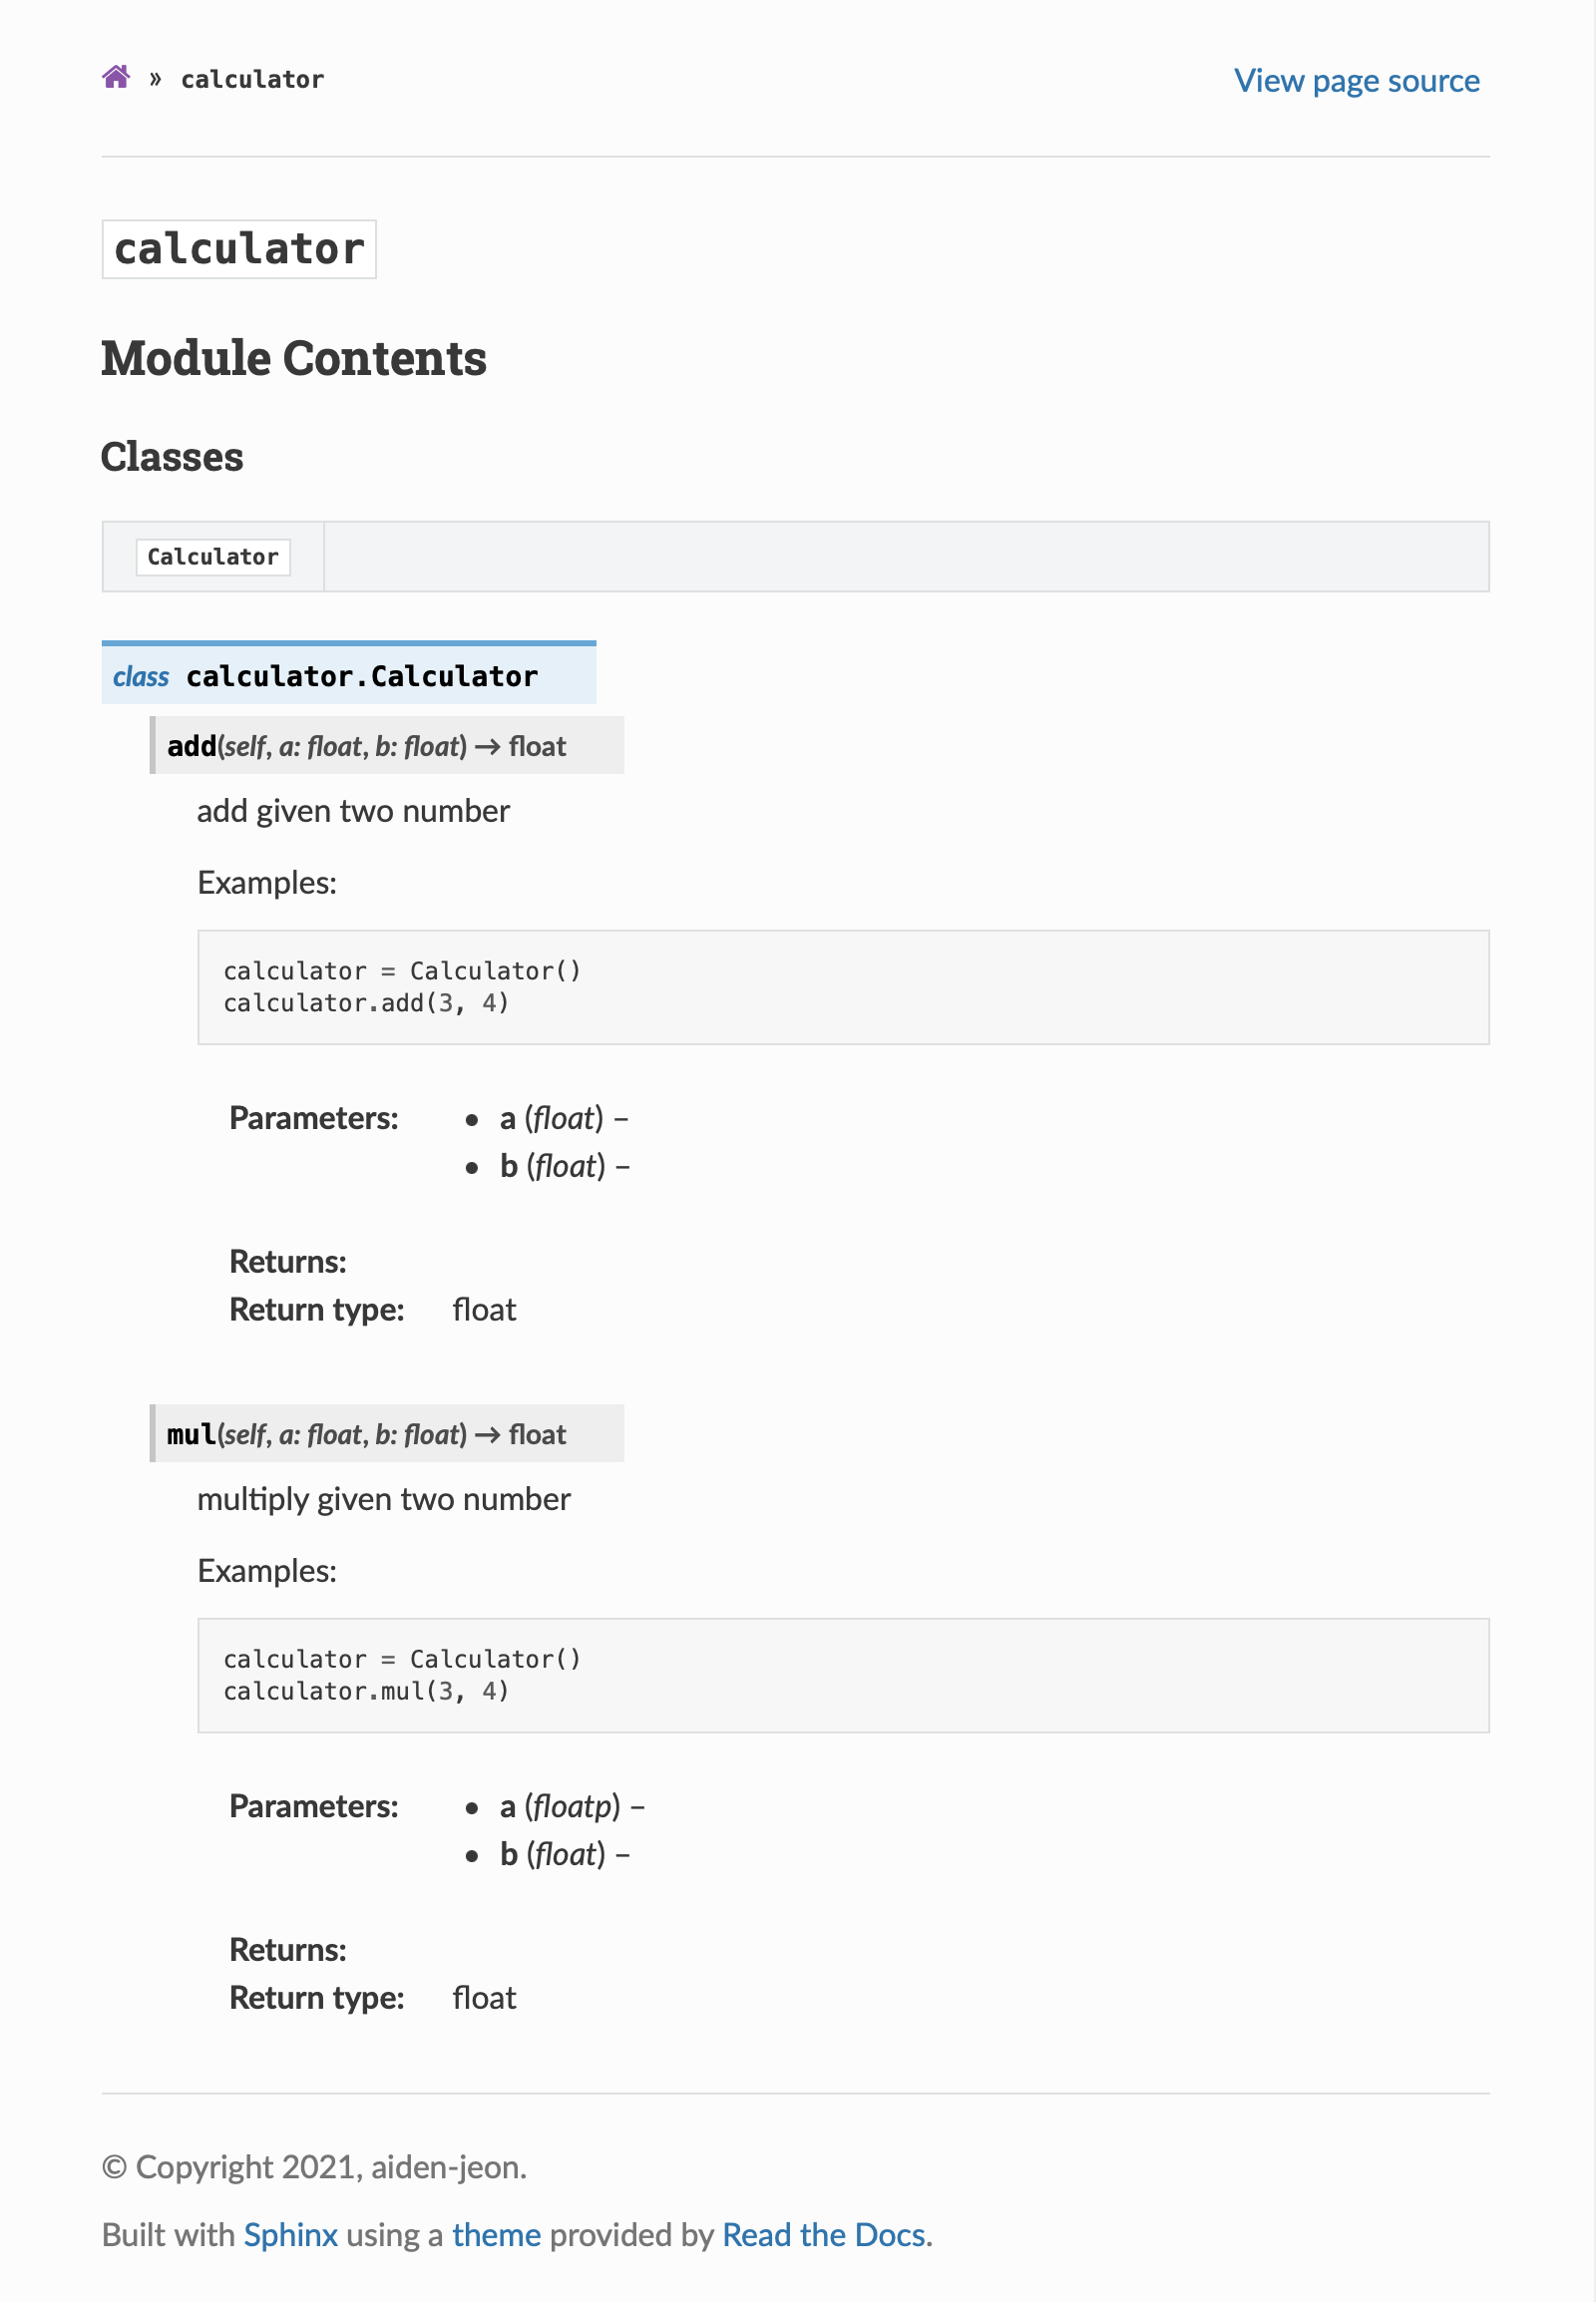
calculator를 눌러보면 위에서 작성한 docstring이 잘 나오는 것을 볼 수 있습니다.
5. docker
이제 생성된 document를 서빙할 수 있는 docker를 만들어 보겠습니다.
docker/Dockerfile 에 다음과 같은 Dockerfile을 만들겠습니다.
1
2
3
| FROM nginx:latest
COPY docs/_build/html /usr/share/nginx/html
RUN chmod -R +rx /usr/share/nginx/html
|
이제 build를 하겠습니다.
1
| docker build . -f docker/Dockerfile -t docs
|
생성된 도커를 실행시켜봅니다.
1
| docker run -p 8000:80 --rm docs
|
http://localhost:8000 로 접속하면 정상적으로 api document 문서가 보이는 것을 확인할 수 있습니다.
해당 내용은 github 에서 확인할 수 있습니다.